Hello and Welcome to my blog! Today we are celebrating the beginning of a new season with the Step into Spring Blog Hop brought to you by the Design Team from Memorable Seasons! If you did not start your hop today on the
Memorable Seasons blog, please jump back over there so you do not miss anything.
Today we are looking at the word S-P-R-I-N-G and taking you through all the steps for creating a fabulous layout using an exclusive sketch created for this blog hop by
Liz Chidester , which was the first step! And of course that would be for the letter S. If you have followed each step you should now be on the letter N.
And its my turn, so we have seen the sketch, picked the papers, used on packaging and inked everything up. So what comes next?
N= needs embellies
How appropriate that I "Miss Gaudy" get to do the embellie part of the lo. Now now girls don't be scared. This is alot easier than you think. Think of it like getting dressed for work, church or wedding. Ya know you have the outfit now you need some accessories to jazz it up.
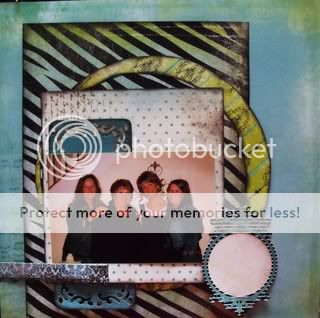
So when deciding what to accessorize with I usually pick a bunch of stuff that would work well with the lo. So here's a photo of where my lo stands after the prior steps. Looks a lil naked dontcha think?
Here's some photos of the stuff I drug out to play with for my embellishments.

Now you dont have to drag out that much stuff but I wanted to show you a variety of stuff that would work. Remember there are no rules to what you can put on your lo. Heck I like to put "not normal" stuff on there it makes it more interesting and fun to look at.
So this first photo I pulled somethings and played around here in this first photo and I dont like it. The 3 buttons on the circle or the lil bunch at the top of the photo-just not working for me.

So here's the next take on it. Its getting better-we'll just keep playing around

Now here are some good rules to remember when adding embellishments to a page.
1. When you have busy, bold pattern papers-less embellies is a must. You dont want the page too too busy so that we are pulled away from our photos. Cuz isnt that whats this is all about?
2. When you have small pattern papers, 1 photo with a plain background aka wall, white background, black ground (you get the picture) well to me thats an open road to go embellishment CRAZY!
3. Now not all of us have "The Camera" so all of our photos arent just perfecto. So when you have something in the corner or the sides that are distracting from your photo-try putting some embellishment to cover it and watch how it draws your eye to the subject of the photo. I have done this on this lo-notice how I covered the staircase?
4. Lastly my own personal piece of advice--have fun with your embellishments-keep them packed in close together on your lo-it draws you to the photo better that way, and layer layer layer girls.
5. When making a cluster put the biggest item on the bottom and start layering from there making sure each piece shows thru-this is my FAVE thing to do. Besides I have an obsession that everything must be touching each other-ok now you know something weird about me--hehehehe!!!
And here is my example up to this point. Remember the rules stated up above-becuz these papers are soo bold and busy I decided to go with just a few embellies, but I did layer them up for added impact.
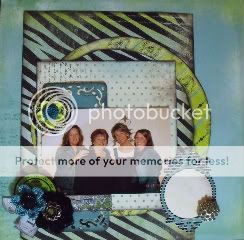
I have my photos and papers picked and have them placed as I have interpreted Liz's sketch, repurposed some Prima packaging, ink'd everything and dressed it up with embellies. Now we are off to
Telah's blog to see what's next.
Be sure to leave me a comment telling me what you think about this step. By doing so, you will be one step closer to a fabulous Memorable Seasons prize as well as getting your name entered in for a RAK from me! Also, be sure to hop all the way until the end, where you will be taken back to the Memorable Seasons forum, where you will see a complete reveal of all the Design Team's finished layouts!


